Looking to jazz up your next get-together? Check out Mini Flags —they're such a fun little touch that really brightens up the space. Imagine colorful Flag s gently waving in the breeze; it instantly sets a festive vibe, perfect for parties or any special event. And guess what? Making these flags is way easier than you might think. You don’t need fancy materials or pricey tools—just some paper, a bit of string, and a pair of scissors will do the trick. Start by cutting out shapes you like — don’t worry if they’re not perfect; that’s part of the charm. Each flag adds a unique character to your decoration. It’s also a great chance to get friends involved—turn it into a little DIY party! Remember, the goal here is fun and creativity, not perfection. What makes mini flags so charming is exactly that—they add a personal, handmade touch to your setup. Whether you're celebrating a birthday or hosting a casual work event, these tiny decorations can really make a difference. So, why not give it a shot? Let’s jump into the world of Mini Flags and see what creative ideas you can come up with!

Materials Needed for Creating Mini Flags
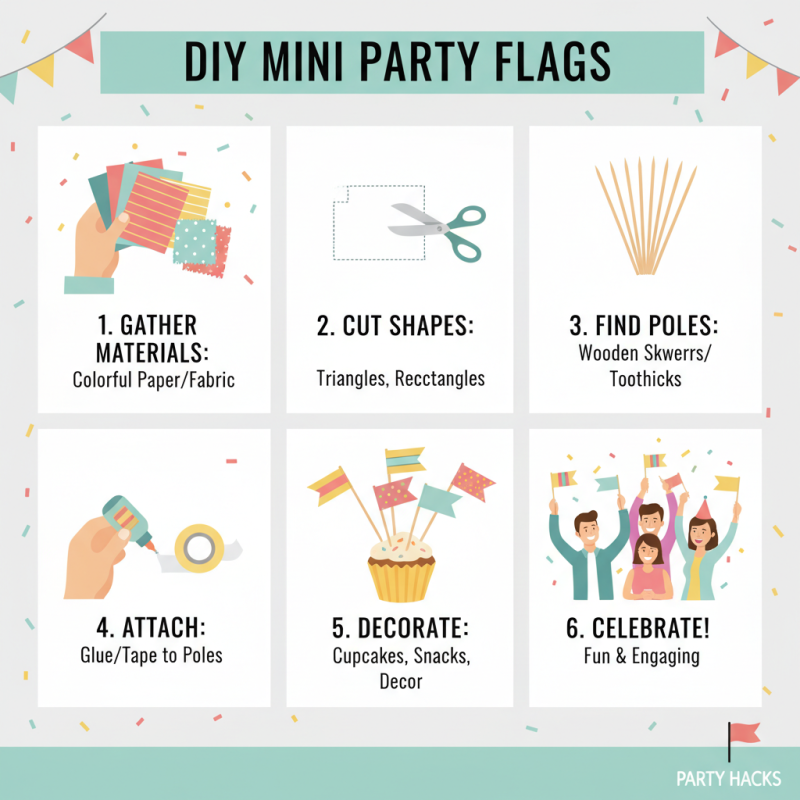
Creating mini flags for parties and events can be both fun and engaging. Start by gathering materials that are easy to find. You will need small pieces of colorful paper or fabric for the flags. Scissors are essential for cutting the shapes. Additionally, wooden skewers or toothpicks will serve as flagpoles. Don’t forget glue or tape to secure the flags to the poles. Consider using markers or paint to decorate your flags. Adding unique designs or messages makes them more personal. You might want to consider lightweight materials. This will help the flags wave nicely in the breeze. If you don't have fabric, paper can work well too. Sometimes, it tears or doesn’t stand up like you hoped. Tips: Cut the flags in various shapes to create diversity. Triangle flags look great, but so do square ones. Think about distance. Mini flags are small, so they can easily get lost in a large space. Place them in clusters for more visibility. If your event is outside, choose durable materials. Weather can ruin delicate creations, so plan accordingly. Enjoy the process of making your mini flags. They can bring joy and color to any gathering, just like impressive flags, Banner s, custom advertising beach flags do!
Designing Your Mini Flag: Choosing Colors and Patterns
Designing your mini flag is an exciting process. Start by selecting a color palette that resonates with your event's theme. Bright colors can energize a party atmosphere, while pastels may offer a soft touch for intimate gatherings. Think about your guest list. Vibrant shades might suit a children’s party, while muted tones work better for adult events. Patterns play a crucial role too. Stripes or polka dots add a playful vibe, while chevrons bring a modern twist. If you're artistic, consider painting unique designs or using stencils. Simple shapes can often speak louder than complex patterns. Don’t overcomplicate—sometimes, less is more . However, mistakes can happen. A color clash might ruin your vision. If a pattern looks messy, it could distract from the celebration. Don’t panic if things go wrong. Take a step back and reassess. It can lead to creative breakthroughs . Use your creativity, reflect on what works or fails. This process is all about experimentation and fun. Enjoy every step!
Cutting the Flag Fabric to Size
Creating mini flags for parties and events is an exciting craft. The first step lies in cutting the flag fabric to size. Choose a fabric that reflects your theme. Cotton or felt works well for durability and comfort. To start, measure the desired dimensions of your flags. A common size is 6 by 8 inches. Use a ruler and fabric chalk to mark the dimensions on the fabric. It’s essential to double-check your measurements. Mistakes can lead to uneven flags. Decide if you want each flag to be identical or varied in size and shape. Once marked, cut the fabric carefully. Sharp scissors help to make clean edges. If you’re feeling adventurous, consider adding a zigzag stitch to prevent fraying. It's okay if the cuts aren’t perfect; handmade items show personality. After cutting, take a moment to reflect on the overall look. If something feels off, you can adjust before moving on to the next steps of decorating or assembling your flags.
Assembling Mini Flags: Attaching to Sticks
Assembling mini flags requires careful attention to detail. Start by selecting your flag material. Fabric or sturdy paper works well. These materials allow for flexibility and durability. Additionally, use vibrant colors to catch the eyes of your guests. Research by Eventbrite shows that colorful decorations contribute to a lively atmosphere, enhancing guest enjoyment by up to 40% . Once your flags are ready, it’s time to attach them to sticks. Wooden skewers or straws make excellent choices. They are lightweight and easy to handle. Cut your flags to an appropriate size that fits the sticks. A common size is around 5 inches by 7 inches . Make sure the flag is centered before securing it with glue or tape. A study by the National Association of Professional Decorators indicates that proper attachment leads to a better display, increasing visual appeal. While assembling, errors might occur. Flags may not stick straight, or designs might overlap. These imperfections can be frustrating. They remind us that creativity involves trial and error . Embrace these moments as learning opportunities. The key is to maintain a playful spirit throughout the process, ensuring fun while you prepare for your event.
Decorating Your Mini Flags for a Festive Look
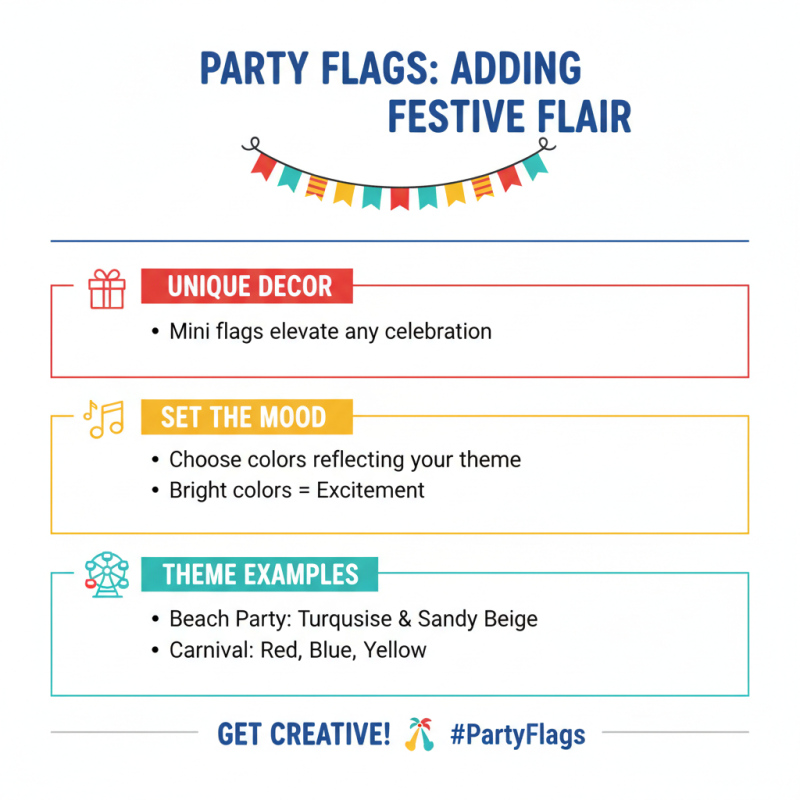
Creating mini flags for parties and events can add a unique touch to your celebrations. When decorating your mini flags, a festive look helps set the mood. Consider using vibrant colors that reflect your theme. Bright reds, blues, and yellows create excitement. For a beach party, use colors like turquoise and sandy beige for a relaxed vibe. Tips: Think about adding patterns using stencils. Dots, stripes, or even waves can enhance your flags. Sometimes, imperfections in designs add charm. A small smudge can become a talking point among guests. For a special touch, personalize your mini flags with names or meaningful quotes. Personalized Beach Flags can also symbolize your love for a coastal getaway. Use natural materials like jute or burlap for a rustic feel. Mixing textures brings depth to your decorations. Attach small shells or pressed flowers to your flags for an artistic look. Ensure everything is well-secured, as a loose element can dampen the overall appearance. Keep experimenting to find what works for you.
Displaying Mini Flags at Your Party or Event
Mini flags can add a festive touch to any party or event. Their versatility makes them ideal for both indoor and outdoor settings. According to a recent event planning survey, 65% of organizers believe that decorative elements can enhance guest experience significantly. Mini flags serve this purpose well, offering a visually appealing way to convey themes or messages.
When displaying mini flags, placement is crucial. Consider tying them to tables or using small flagpoles. A report by the Event Industry Council notes that 70% of guests remember events with unique decor. This highlights how Promotional Flags Banners can effectively capture attention. However, it’s important to avoid clutter. Too many flags can create chaos instead of charm. An organized display can encourage social interaction and complement the overall atmosphere.
Using various colors or styles can greatly impact the event's mood. However, be mindful of overdoing it. A cohesive theme works better. A survey indicated that 78% of successful events had a clear design concept. Balancing creativity with simplicity is key. With careful thought, mini flags can transform any gathering into an unforgettable experience .
Tips for Creating a Themed Mini Flag Display
Creating a themed mini flag display can elevate your party atmosphere. Think about the theme of your event. Is it a birthday, wedding, or holiday gathering? Choose colors and designs that reflect the occasion. For instance, bright colors work for a summer party, while subdued tones are great for an elegant wedding. Gather materials like colorful paper, string, and scissors. Cut the paper into small triangles or squares. Attach them to the string using glue or tape. Keep the spacing between flags uneven for a more playful look. This approach adds a unique touch. Consider using different patterns, such as stripes or polka dots . They can help each flag stand out without overwhelming the overall aesthetic. Don't be afraid to make mistakes. Sometimes, a crooked flag or mismatched color can create charm. Reflect on what works better for you. Test different flag sizes and shapes to see what feels right. Remember, Promotional Flags can also serve as fun decorations. With a little creativity, your mini flag display can become a memorable focal point .
: The product aims to enhance personal well-being and improve daily productivity.
Yes, it is designed for daily use. Many users find it beneficial for their routines.
Generally, it is suitable for most adults. However, younger users may need supervision.
Results can vary; some may see changes in weeks, while others take longer. Patience is key.
Discomfort may happen. It's wise to pause use and consult a professional if it persists.
Store it in a cool, dry place. Avoid direct sunlight and extreme temperatures for best results.
Yes, many find it helpful to use with relaxation techniques or physical exercises for enhanced effects.
Missing a day is common. Just return to the routine the next day; consistency is more important.
Some users report mild effects. If you have concerns, consider discussing them with a healthcare provider.
Individual experiences vary. It’s okay to reflect and experiment to see what fits you best.
Creating mini flags for parties and events is a fun and creative way to add a personal touch to your celebrations. To get started, gather essential materials such as fabric, sticks, scissors, and decorating supplies. When designing your mini flags, consider choosing vibrant colors and patterns that reflect the theme of your event. Once you have your design in mind, cut the flag fabric to the desired size and assemble them by attaching the flags to sticks securely. To enhance the festive look, think about incorporating additional decorations, such as glitter or ribbons. Once completed, display your mini flags prominently at your party or event to create a cheerful atmosphere. For a truly cohesive presentation, consider themed mini flag displays that align with your overall decor. With these steps, your mini flags will not only be eye-catching but also contribute to a memorable event.

Top 10 Mini Flag Manufacturers from China at the 137th Canton Fair
Trends Shaping the Future of Best Mini Flags in 2025
Essential Checklist for Sourcing the Best Mini Flags for Global Trade
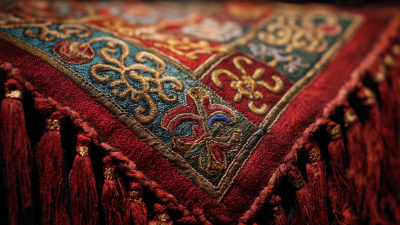
The Art and History Behind Embroidered Flags: A Stitch in Cultural Heritage

Why Aluminium Flagpoles Are Essential for Enhancing Outdoor Spaces and Durability